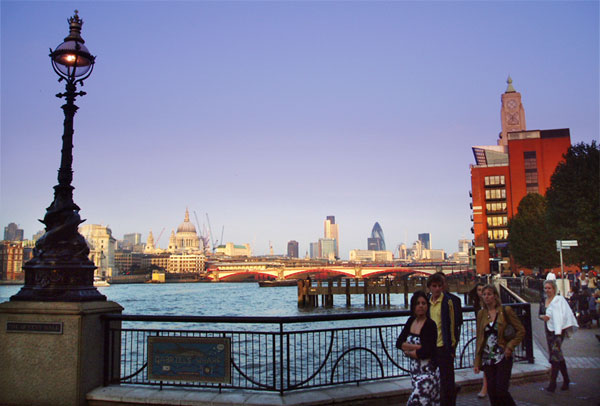
The above picture is one of my snaps taken very quickly at the end of clearish autumn day. I have improved this picture with Photoshop by selecting certain areas and altering the colour, brightness and contrast.
I first thing I did was to copy the photo to a new layer (Cmd/Cntl-J) I then use my method for creating a layer mask with the Gradient tool which was explained in the previous post to mask out the sky. I then used Image > Adjustments > Curves… (Cmd/Cntl-M) and clicked the Auto button (this finds the lightest part of the selection/layer and makes it white and finds the darkest part of the selection/layer and makes it black). Further contrast can be added by creating an ‘S’ shape out of the curve (see below). Contrast essentially means making dark areas darker and light areas lighter.
Then to make the picture more interesting I isolated the people at the bottom right with the Lasso tool (L) with a Feather of 15 to blur the edges and applied contrast using the same technique.
The original layer is now the lower half of the picture. I used Image > Adjustments > Curves… (Cmd/Cntl-M) to brighten the sky and, more importantly, to take out some green and add some blue to give the sky a more interesting look.


I have definitely RSS ed your feed since the last two posts please keep on creating these tips. I am a simple intern trying to learn how to make an attractive design. This language is simple and to the point.
Another great tip I tell beginner photoshop photo retouchers is to use levels to bring out the blacks and whites.
I would like to work with ur company as freelancer.If u are interested then mail me i will send my resume.
thanks
Thanks, Mike. Thanks Lcd Love. I’ll send you an email, jaspreet.
Thanks a lot, Rob! This tutorial is very useful for me.
I’m glad it’s of help to you, Photoshop User.
Nice and simple tut Rob. Good Stuff
Acuity Designss last blog post..Photoshop Adjustment Layer and Retouching Tutorial with Video
it is first what need to do with photos before use them in webdedign
Thank you Acuity Designs and Website templates. Simple, obvious and basic advice for putting photos in websites. But how many times do we see photos that lack contrast and could do with a bit of work published?!
Great idea to post this – tons of people are now using photoshop and this tutorial can really help. The fact that you added screenshots is great too 🙂
Thank you very much for the comment, Charleston Marketing and Design, I hope the Photoshop tutorial is of help to some people and yourself. I should do more.
hello, this is my first visit at ur blog. nice to noe u mate.
i would like to thanks to you for this helpful photoshop tutorial.
i will subscribe to ur blog rss feed. im newbie in photoshop.
cheers!
p/s: im from malaysia, did u noe where it is located? lol
Hello and welcome baloot, I hope you will come back or pick up something from the RSS feed. Loads more to come here about Photoshop, web design and graphic design. I’ve actually been to Malaysia but only for a short time whilst traveling in Thailand.
Another great tutorial. Your a genius!