Email marketing is one of the most effective ways of building an audience, creating an online business and making money.
If you need any persuading about the importance of email marketing, heres what marketing expert, Glen Allsopp from Viperchill says:
“Email subscribers are more likely to buy your products than any other type of audience.”
The email marketing service I use, AWeber, divides the emails you send out into three technical categories: Broadcast, Followup and Blog Broadcast.
Broadcast Emails are one-off messages, Followup Emails are pre-written messages sent automatically at intervals after signup, but, Blog Broadcast Emails are your latest blog posts in the form of a newsletter.
Blog broadcast emails don’t take long to set up and take zero time to maintain.
So, here’s how you do it
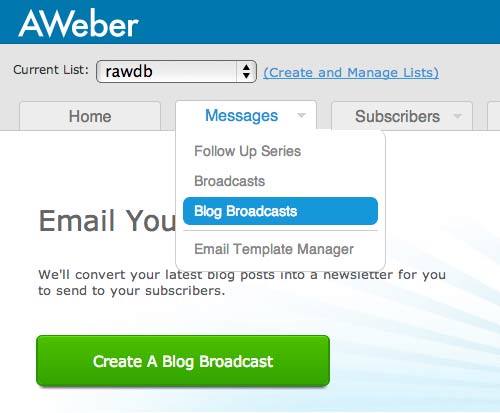
After choosing the list you want to send the blog broadcasts to in “Current List” on the AWeber dashboard, select Blog Broadcast from the Messages drop-down, then click the large green “Create A Blog Broadcast” button and get going!
You’ll now be asked for your RSS Feed URL. This is very easy. All you have to do is add /feed on the end of the URL of your blog. So, if your latest blog posts are on your home page, your RSS Feed URL will be:
http://your-website.com/feed
If your latest blog posts are on another page of your website, your RSS Feed URL will be:
http://your-website.com/blog/feed
If you only want to send the blog posts from a certain category, your RSS Feed URL will be:
http://your-website.com/category/toenails/feed
Don’t worry, we can test this later to see if you’ve got this right.
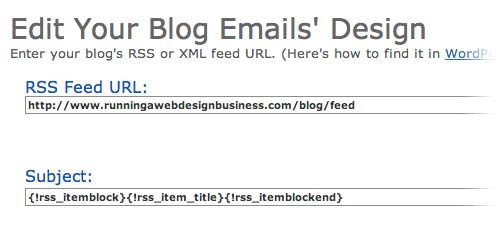
Next up is the subject of your emails. You can put whatever you like in here. However, if you do put “Such-and-such Newsletter” as the subject, people are going to see the same subject, week in week out. That may be a little boring. So try add the following AWeber variable.
{!rss_itemblock}{!rss_item_title}{!rss_itemblockend}
We’ll be talking more about the wonderful world of AWeber variables later on, however the above variable will add the title of your latest blog post in the subject of the email.
You can then choose your template on the right and click “Load Template”.
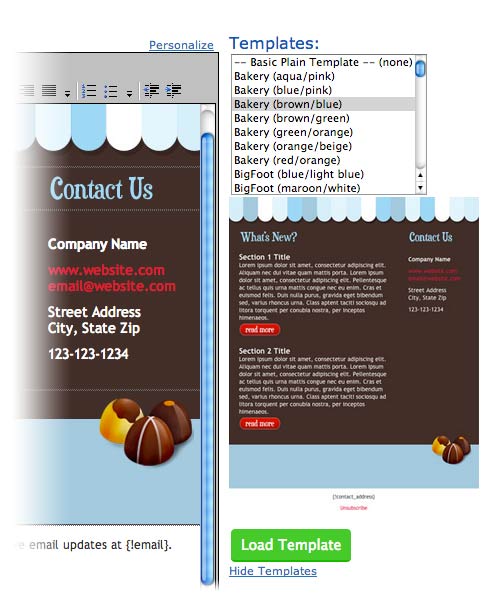
This may take you a bit of time and, if you don’t like any of them, don’t worry, I have a custom solution coming.
When to send
Next you have to choose when your emails should be sent. The following settings ensure that a new “newsletter” (or blog broadcast email) will be queued to be sent at 11am EST after a new blog post is written
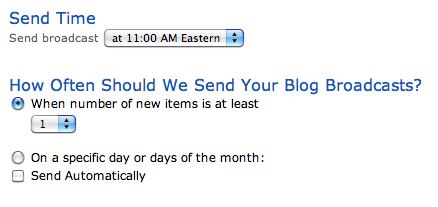
You notice I said “queued to be sent” not sent. That is because I don’t have “Send Automatically” checked. I would recommend you leave this unchecked, at least for the first few, as it’ll enable you to check them before you eventually send them out via Messages > Broadcasts in the dashboard.
As you can see above, you can also set a specific day of the week or the month for these messages to be sent.
Saving and sending
Once you’re done, click the green Save Blog Broadcast button and that’s it! Although there’s a couple of really important points to remember.
You can go back anytime and change the design or content of your blog broadcast email by going to Blog Broadcasts in the Messages drop-down.
Also, don’t forget to go to the Broadcast option in the Messages drop-down where you can test, delete and send your emails.
You should send a test to yourself to see if your happy with the design and content of the blog broadcast.
Create a custom blog broadcast email
If you don’t like any of the AWeber blog broadcast templates (and I wouldn’t blame you if you didnt!) you can create one yourself very easily.
Here is the text you can add to the text editor to build one yourself:
{!rss_itemblock}
Hello there,
Here is a link to my latest blog post.
{!rss_item_title}
{!rss_item_description}
{!rss_itemblockend}Hope you like it!
Rob
I found this blog post and video really helpful in creating custom blog broadcast messages.
As you can see above I first have a line of introduction to the email. After that I use AWeber variables to display the title of the blog post, {!rss_item_title}, followed by an excerpt from the blog post, {!rss_item_description}.
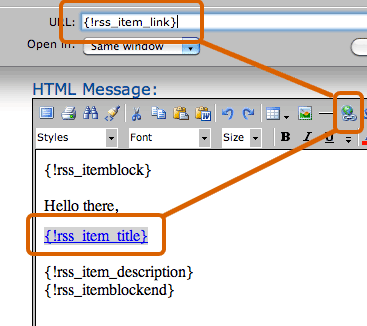
{!rss_item_title} does not supply the link to the blog post. You need to highlight the variable, click the link icon in the text editor and enter {!rss_item_link} as the link to make sure the post title links through to the post.
{!rss_item_content} is the AWeber variable that puts out the whole blog post. I don’t use this as it would take away any incentive of going to the site.
Notice the RSS variables need to be preceded with {!rss_itemblock} and succeeded with {!rss_itemblockend}. This is the same in the subject line of the email as well if you want that to be the title of the latest blog post.
Also, really importantly, you may want to delete all but one of your latest blog posts in Messages > Broadcasts as this technique will create an email for every one of the blog posts in your RSS feed.
You can do it!
You can set up a fully automated weekly email newsletter to ensure engagement and traffic for years to come!
Do you have an email list? Do you send broadcast, followup or blog broadcast emails? Or a combination? What do you think is the best type of email?
Hi,
Very good content! Thanks a lot for this nice strategy!
Hi Michael, thank you, hope it was helpful.
I’m in the process of moving subscribers from FeedBurner to AWeber, in case FeedBurner eventually dies. I’ll lose a lot of the contacts, but those I lose probably weren’t very interested in my updates anyway.
There will be a bit of “natural wastage” but, as you say, you’ll be left with the “hardcore” of your followers! 🙂 Let me know if you need any help with Aweber, David.
Cheers Rob. I hope you’ve been well lately.
All good here, David, I hope you’re well too. Nice to see you back here again. 🙂